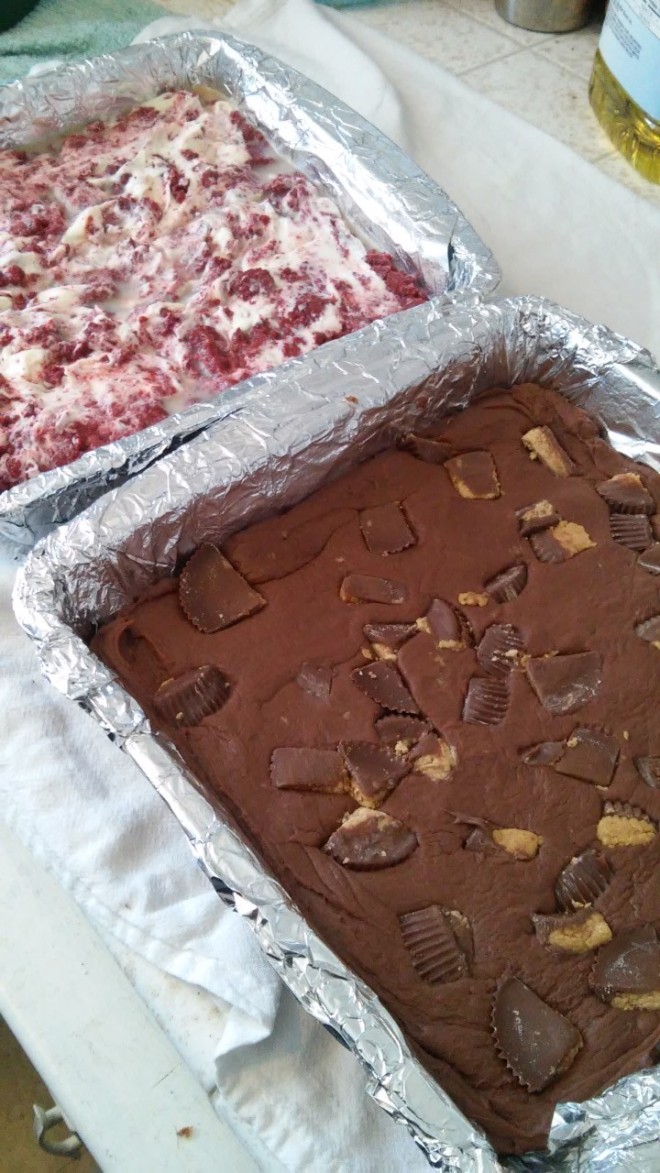
I absolutely, positively love fudge! It’s one of my favorite treats and I love making it. This week I’ve made 2 versions of fudge that I’ve never done before but I’m so happy I’ve made them now.
First up let’s go with the more classic of the 2, Reese’s Peanut Butter Cup Fudge. Just that name puts a smile on my face. I love peanut butter cups and I love fudge so you know it’s gonna be good and it so is. Now for people who have a fear of making fudge this is the recipe for you. No double boilers needed, no candy thermometer needed…just a glass bowl and a microwave and you’re good to go. But as easy as this is let me give you a couple of helpful hints. You start out by placing whole peanut butter cups in the bottom of the pan. It was a little warm in my house so I put them in the fridge for about 10 minutes and this helps when it comes to unwrapping all of them. Your hands get warm and those little suckers will start melting on you quick. Now the recipe called for 3 cups of chocolate chips and again how many cups are in a bag? Well, it’s approximately 2 cups in a bag so you’ll need a bag and a half but you can eyeball this and still come out just fine. Last helpful hint, make sure everything is dry before you start melting your chocolate. Just a little bit of water can ruin chocolate and there’s no coming back. If I’m melting chocolate in the micorwave I put my glass bowl in there empty first and heat it for about 20 seconds. If there’s any moisture in the bowl it will be dry now and it heats the bowl up giving the chocolate a little head start. After melting everything down you just pour it over the peanut butter cups smooth it out and top it with chopped up peanut butter cups. It is awesome….trust me on that!
Next up was the Red Velvet Cake Batter Fudge. This recipe intrigued me because it’s really freaking weird. It’s start with dry red velvet cake mix, which is odd enough for fudge but then you heat it with butter and a little bit of milk. When it came out of the microwave I was a little concerned because it had the consistancy of really lumpy cake batter. Then I stirred in my white chocolate chips and the texture didn’t change all that much and I was honestly very concerned at that point. Fudge is supposed to be smooth and creamy but this looked very grainy and weird. Now I did go my own way on this recipe because to me, it’s not red velvet without the cream cheese frosting. The recipe suggesting topping the fudge with white spinkles but I decided to swirl in some cream cheese frosting instead. When I had it all together it looked like a horrifying mess and I was pretty convinced that this stuff was not going to see the outside of my kitchen. But I covered it and put it in the fridge over night like the recipe said. The next morning I pulled it out and it still looked a little odd but I sliced it and gave it a taste test and it was smooth and creamy and delicious. I have absolutely no idea how that happened other than magic fudge elves came into my kitchen and worked a little magic on it. I would be interested to see if you could do the same with other cake mixes.
In the end I would give both of these recipes a thumbs up. These would be ideal for holiday parties or gift giving. The chocolate fudge is best at room tempture whille the Red Velvet seems to be best a little colder, just an FYI. But you should totally give them both a try…even if it’s just to test and see if you have Fudge Elves in your kitchen too!
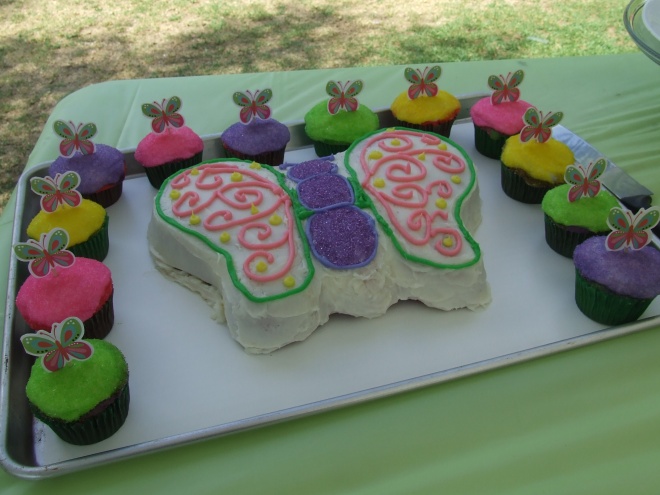 I used just your basic vanilla cake recipe and a simple cream cheese frosting. I always add about a half a lemons worth of juice in my frosting just to give a little extra zip. And then I dipped the cupcakes in different colors of sugar sprinkles. The picture doesn’t do them justice cause they really shimmered in person.
 For her smash cake I used the same recipe in a 6 inch cake pan and once again I had my trusty friend Anthony do the writing for me.